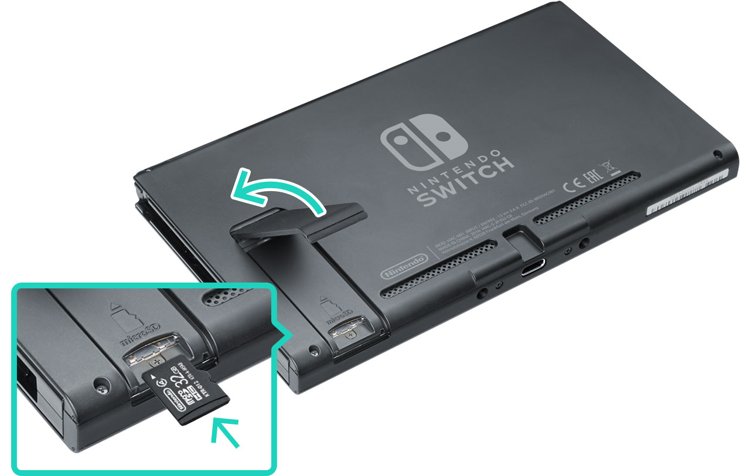
 If you just got a Nintendo Switch, some of you might be wondering how you Insert/Remove a microSD card into the system.
The process is quite simple and I am going to show you how to do it.
How to Insert/Remove a Nintendo Switch SD Card
Please Note: Before you plan on installing or removing a SD card from the Nintendo Switch, please make sure that the console is powered off.
To power it off
- Hold down the POWER Button for 3 seconds
- When the menu pops up, Select “Power Options” > “Turn Off.”
Step 1 (Finding the MicroSD Slot)
Once the system is powered off, pull out the stand at the back of the system, you will be able to see the Nintendo Switch SD card slot.
Step 2 (Inserting the SD Card)

Looking at the diagram above, make sure the memory card’s label is facing away from the console (it can only go in one way). From there you are going to push the card into the Nintendo Switch SD card slot until it clicks in place.
Step 3 (Removing the SD Card)
To remove the microSD card from the slot, all you do is press down on the top of the card until you hear a slight click. From there, you can then slide it out.
When it comes to the Nintendo Switch SD card, it is a good idea to upgrade the storage space of your system, simply because the Switch’s internal storage can fill up very quickly.
